Paul Sellers
Published Dec 1, 2023This bandsaw hack is one you have never seen before because I invented it.
Planing dead flat for hand planing or power planing can take time, but this bandsaw method takes only a few short minutes to do, and you are on your way to your work faster than blinking.
(more…)
March 20, 2024
Jointing on a Bandsaw | Paul Sellers
May 12, 2021
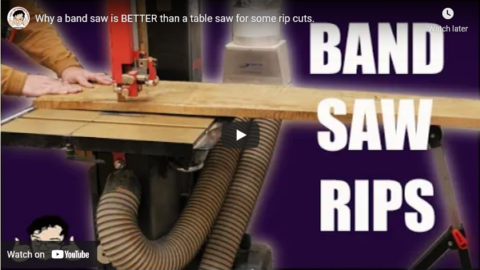
Why a band saw is BETTER than a table saw for some rip cuts
Stumpy Nubs
Published 6 Feb 2021We identify the times when a band saw is the better choice for rip cuts, and how to get the best results with it.
When you use this link to visit our sponsor, you support us►
Harvey Woodworking Machinery: https://www.harveywoodworking.com/
Subscribe (free) to Stumpy Nubs Woodworking Journal e-Magazine► http://www.stumpynubs.com/subscribe.htmlFollow us on social media►
Instagram: https://www.instagram.com/stumpynubs/
Twitter: https://twitter.com/StumpyNubs
October 15, 2020
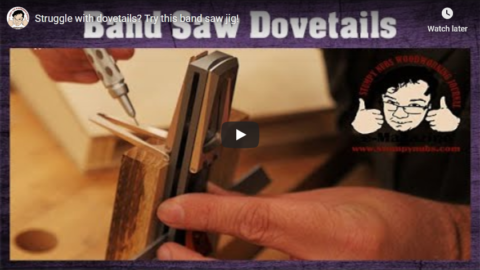
Struggle with dovetails? Try this band saw jig!
Stumpy Nubs
Published 11 Jul 2020This is how I cut dovetails when I was a new woodworker- It works!
When you use this link to visit our sponsor, you support us►
Harvey Woodworking Machinery: https://www.harveywoodworking.com/
Bridge City Tools multi-tool► https://bridgecitytools.com/products/…
Subscribe (free) to Stumpy Nubs Woodworking Journal e-Magazine► http://www.stumpynubs.com/subscribe.htmlFollow us on social media►
Instagram: https://www.instagram.com/stumpynubs/
Twitter: https://twitter.com/StumpyNubs
August 8, 2019
Folding a Bandsaw Blade | Paul Sellers
Paul Sellers
Published on 14 Apr 2014In this video Paul shows you how to fold a bandsaw blade safely and efficiently.
For more information about Paul Sellers and the projects he is involved with visit: http://paulsellers.com
July 6, 2019
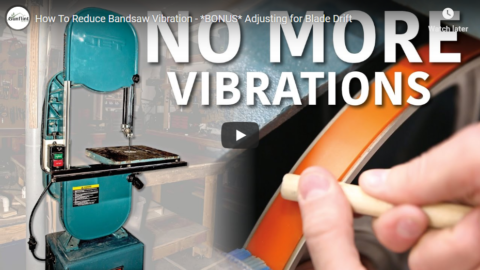
How To Reduce Bandsaw Vibration – *BONUS* Adjusting for Blade Drift
Gunflint Designs
Published on 27 Apr 2017Check out how I tuned up my bandsaw and took it from a shaky, unpleasant monster, to a smooth running dream. I installed some new urethane tires and a new drive belt and completely changed the attitude of this machine. Stay till the end to see the really simple method I use to adjust a bandsaw fence to account for blade drift.
June 10, 2019
The DEFINITIVE Guide to Setting up a BANDSAW
Matt Estlea
Published on 8 Jun 2019In this video, I show you how to set up your bandsaw for optimum performance. I’ll take you through everything from blade selection to tensioning, tracking, bearing adjustment and fence alignment to get your bandsaw performing as it should do!
____________________________________________________________________Videos Mentioned:
Cutting up a Log:
https://www.youtube.com/watch?v=KfCR2TOrdwEAlex Snograss Bandsaw Setup:
https://www.youtube.com/watch?v=bxVyKsbuwZQSandpaper Rack:
https://www.youtube.com/watch?v=LHBrhCxhi6cBandsaw VS. Table Saw
https://www.mattestlea.com/post/should-i-get-a-bandsaw-or-a-table-saw
____________________________________________________________________Support what I do by becoming a Patron! This will help fund new tools, equipment and cover my overheads. Meaning I can continue to bring you regular, high quality, free content. Thank you so much for your support! https://www.patreon.com/mattestlea
____________________________________________________________________See what tools I use here: https://kit.com/MattEstlea
My Website: http://www.mattestlea.com
____________________________________________________________________My name is Matt Estlea, I’m a 23 year old Woodworker from Basingstoke in England and my aim is to make your woodworking less s***.
I come from 5 years tuition at Rycotewood Furniture Centre with a further 1 year working as an Artist in Residence at the Sylva Foundation. I now teach City and Guilds Furniture Making at Rycotewood as of September 2018.
I also had 5 years of experience working at Axminster Tools and Machinery where I helped customers with purchasing tools, demonstrated in stores and events, and gained extensive knowledge about a variety of tools and brands.
During the week, I film woodworking projects, tutorials, reviews and a viewer favourite ‘Tool Duel’ where I compare two competitive manufacturers tools against one another to find out which is best.
I like to have a laugh and my videos are quite fast paced BUT you will learn a lot, I assure you.
Lets go make a mess.
April 12, 2019
How to Make a Bandsaw Tool Tray | Paul Sellers
Paul Sellers
Published on 11 Apr 2019This Bandsaw tool tray is a great training project for the Bandsaw. The magnetic design makes it a perfect solution for keeping wrenches like spanners and Allen keys organised and close at hand. They are fast to make, super strong and everything shrinks appropriately in the right direction.
Please note: Before you begin, work safely. Make certain the guards are in place and adjusted to the correct protective height or distance and then fully locked off and locked down. Slipping fences, stops and guards are not always obvious to you when your focus and awareness is on the blade and cutting.
See Paul’s Blog for an additional detailed exercise guide: https://paulsellers.com/2018/12/an-ex…
Want to learn more about woodworking? See https://woodworkingmasterclasses.com or https://commonwoodworking.com for step-by-step videos, guides and tutorials. You can also follow Paul’s latest ventures on his woodworking blog at https://paulsellers.com/
March 16, 2019
Band Saw Clinic with Alex Snodgrass
thewoodworkingshows
Published on 29 Dec 2011Alex Snodgrass from Carter Tools demonstrates how to adjust your Band Saw for optimal performance
H/T to Clive for sending the link.
February 4, 2019
Top 10 Woodworking Tips & Tricks | Paul Sellers
Paul Sellers
Published on 4 Jan 2019When you have been woodworking as long as Paul you have little shortcuts and techniques that you gather and use throughout your woodworking. Here are 10 that Paul put together for this video:
1. PRE-FINISHING THROUGH TENONS 0:12
2. PLANING SUPER THIN STOCK 0:55
3. MAGNETIZE YOUR PUSH STICK 1:42
4. SQUARE PEG, ROUND HOLE 2:05
5. ROUTER PLANE AS A GAUGE 2:38
6. PUSHING A PIN INTO END LINE 2:58
7. SHARPEN A PENCIL WITH CHISEL 3:23
8. IRONING OUT THE DENTS 3:44
9. SUPER GLUE WICKING 3:58
10. FILING THE FIRST FEW TEETH 4:39For more information on these topics, see https://paulsellers.com or https://woodworkingmasterclasses.com
December 1, 2018
How to Set Up a Bandsaw | Paul Sellers
Paul Sellers
Published on 30 Nov 2018These instructions on setting up a bandsaw should get you going with your machine. Paul swaps the blade in his machine and then goes through the process of aligning the blade and bearings as well as adjusting the tension for a pristine cut.
For more information on these topics, see https://paulsellers.com or https://woodworkingmasterclasses.com
November 17, 2018
Introducing the Bandsaw | Paul Sellers
Paul Sellers
Published on 16 Nov 2018Paul introduces the bandsaw as an extra tool to free up time and energy to focus on hand tool woodworking. He goes over the uses of a bandsaw and the features that he looks for when acquiring one.
For more information on these topics, see https://paulsellers.com or https://woodworkingmasterclasses.com
From the YouTube comments section for this video:
csandlund1
2 hours ago
It’s like watching the Pope do a video on the joys of sex. Fascinating, but completely unexpected.
November 18, 2017
The Best Way to Set Up a Bandsaw!
The Wood Whisperer
Published on 6 Jul 2017Back in 2007, I posted a video on Bandsaw Setup. The method I demonstrated was one I learned from other woodworkers as well as numerous books and manuals. While the method works perfectly, it overcomplicates things and employs a couple of unnecessary steps, namely achieving coplanarity of the wheels and eliminating drift. Four years later, I became aware of a video from The Woodworking Shows featuring Alex Snodgrass and his simpler (and nearly foolproof) method for bandsaw tuneup. I have since become friendly with Alex and asked him if he’d be willing to come out to my shop to film his setup method. He agreed and here we are! I can say without a doubt that this is the BEST way to set up a bandsaw.
Align the Blade
Install the blade and apply just enough tension to keep the blade securely on the wheels. Use the tracking adjustment while turning the wheel by hand to line up the deepest part of the gullet with the center of the top wheel.
Tension the Blade
You can usually ignore the tenon meter on most bandsaws as they are notoriously inaccurate. Instead, tension the blade until your finger is only able to deflect the blade by about 1/4″. This test should be done at the back of the saw where nothing can get in the way of the blade. The amount of pressure you apply to the blade shouldn’t result in turning your finger white. If that happens, you’re pushing too hard. After the tension is set, make sure the blade is still tracking properly with the gullet in the center of the top wheel.
Side Guides (Front to Back)
The front of the side guides should be located about 1/16″ back from the deepest part of the blade gullets. You don’t want the side guides to contact the cutting teeth of the blade since the teeth flare out at a slight angle. This adjustment is made to both the top and bottom guides.
Thrust Bearings
Adjust the thrust bearings carefully so that they do NOT rotate while the blade moves, but they DO begin to rotate as soon as light pressure is applied to the blade. Spend the necessary time to get this adjustment just right. Of course, you’ll do this adjustment to both the top and bottom guides.
Side Guides (Side to Side)
Just like the thrust bearing adjustment, the side guides should be as close to the blade as possible without actually touching. So when the blade moves the bearings should be stationary. When a slight amount of pressure is applied to the blade as its moving, the bearings should spin.
Square the Table
Using a 2×4 or 2×6, make a partial cut into the face of the board. Turn the saw off, flip the board around and try to get the blade to slide into the cut slot. If it slides in easily and without resistance, we know the table is 90 degrees to the blade. If it doesn’t slide in, make adjustments to the table and cut/test again. The wider the board is, the more accurate this test will be.
Align the Fence
The fence can be aligned parallel with the body of the blade using nothing more than a ruler. Be sure the ruler is resting on the body of the blade between the teeth. With a long enough ruler you can easily align the fence by eye. Alex shows us the F.A.S.T system which is a simple and convenient way to do this same task.
Test Cut
Since the overall goal of this setup process is to prepare for resawing, a good test is to slice off a thin veneer from a jointed and planed board. In our first test cut we were able to slice off a piece that was .016″ or just over 1/64″. This is way thinner than anything I’d ever need but it’s pretty cool to see that the saw is capable of making such a delicate cut.
Special thanks to Alex Snodgrass and Carter Products for helping make this video possible. Happy bandsawing!


